Few things are more frustrating than checking on a print that’s been running for hours only to discover that your printer stopped extruding halfway through. In many cases, the culprit is a clogged 3D printer nozzle.
Nozzle clogs are one of the most common issues faced by FDM (Fused Deposition Modelling) users, whether you’re a beginner printing your first benchy or an experienced maker producing functional parts. The good news? Most clogs are easy to diagnose, straightforward to fix, and largely preventable with the right maintenance habits.
In this guide, we’ll explain how to identify different types of nozzle clogs, how to clear them safely, and the best ways to prevent them from disrupting your future prints.
Why Do 3D Printer Nozzles Clog?
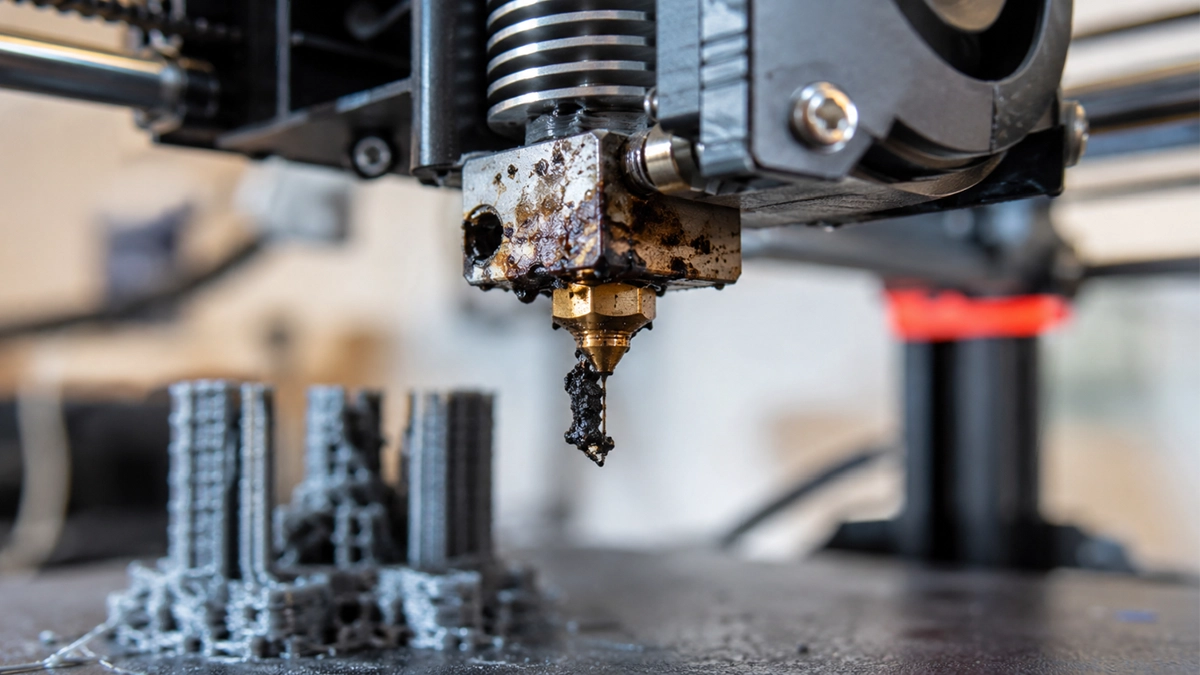
The nozzle is the final stage of your printer’s hotend assembly. Molten filament is pushed through a tiny opening—typically 0.4mm in diameter—under pressure to create each layer of your print.
Because the opening is so small, it only takes a tiny amount of debris, degraded filament, dust, or carbonised material to restrict the flow of plastic. Over time, these restrictions can develop into a partial or complete blockage.
Factors that commonly contribute to a 3D printer nozzle clog include:
- Poor-quality filament
- Moisture-contaminated filament
- Printing at incorrect temperatures
- Material residue from filament changes
- Heat creep in the hotend
- Worn or damaged nozzles
- Filament grinding in the extruder
Understanding the cause is the first step towards solving the problem.
Common Types of Nozzle Clogs
Not every clog behaves the same way. Identifying the type of blockage, you’re dealing with can save a significant amount of troubleshooting time.
Partial Clogs
A partial clog restricts filament flow but doesn’t stop it completely.
Your printer will continue printing, but you may notice:
- Thin or inconsistent layers
- Gaps in walls
- Weak top layers
- Under-extrusion throughout the print
Partial clogs often develop gradually as residue accumulates inside the nozzle.
Full Clogs
A full clog completely blocks filament movement.
Common symptoms include:
- No filament exiting the nozzle
- Extruder clicking or skipping
- Grinding sounds from the extruder
- Prints stopping mid-layer
Full clogs can occur suddenly or develop from a worsening partial blockage.
Heat Creep Clogs
Heat creep occurs when excessive heat travels upward from the hotend into the cold zone.
Instead of melting only inside the nozzle, the filament softens too early and expands inside the heat break, creating a jam higher up in the assembly.
Heat creep is often caused by:
- A failing hotend cooling fan
- Blocked airflow
- Printing too slowly at high temperatures
- Hotend cooling issues
Unlike standard nozzle clogs, heat creep requires a slightly different troubleshooting approach.
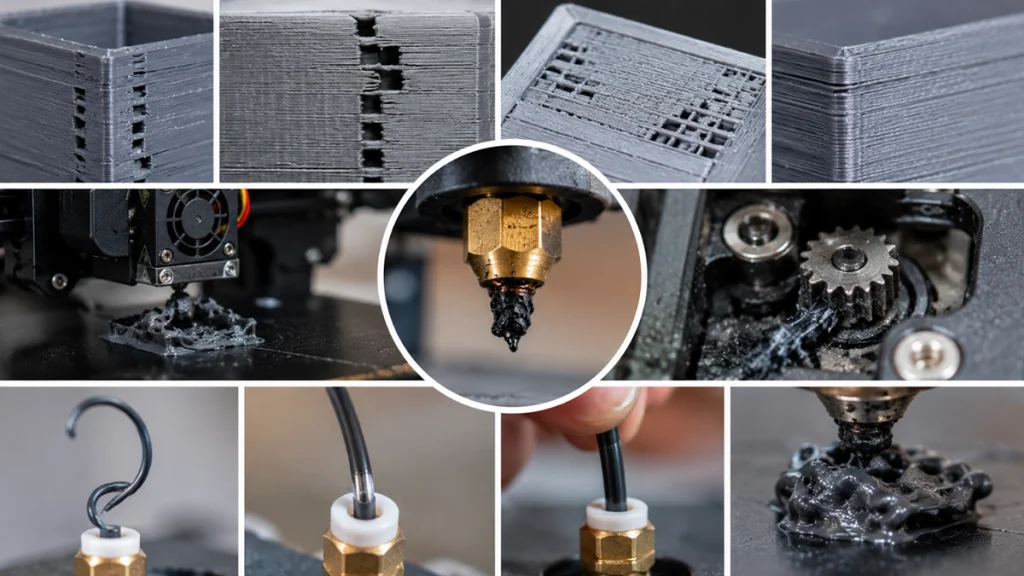
Signs Your 3D Printer Nozzle Is Clogged
Recognising a clog early can prevent failed prints and wasted filament.
Watch for these warning signs:
During Printing
- Under-extrusion
- Missing layers
- Inconsistent extrusion
- Gaps in walls or top surfaces
- Extruder clicking noises
- Grinding sounds from the filament drive gear
- Complete loss of extrusion
When Loading Filament
- Filament refuses to feed smoothly
- Excessive resistance when manually pushing filament
- Filament curling upwards at the nozzle
- Rough or bubbly extrusion during purging
If you notice one or more of these symptoms, it’s time to inspect your hotend.
How to Unclog a 3D Printer Nozzle
There are several effective methods for clearing a blockage. It’s usually best to start with the least invasive option and work your way up.
1. Perform a Cold Pull
The cold pull method is one of the most effective ways to remove debris and residue from inside a nozzle.
How to Perform a Cold Pull
- Heat the nozzle to the normal printing temperature of the loaded filament.
- Push filament through manually.
- Lower the temperature:
- Around 90°C for PLA
- Around 130–140°C for PETG or ABS
- Once the target temperature is reached, pull the filament out firmly.
- Inspect the end of the filament for debris or contamination.
- Repeat until the filament comes out clean.
Nylon is widely regarded as the best material for cold pulls, although PLA can also work well.
2. Increase the Temperature Slightly
For minor partial clogs, raising the nozzle temperature by 10–20°C can sometimes soften residue enough to push it through.
Once heated, manually extrude filament and check whether normal flow returns.
3. Use a Nozzle Cleaning Needle
Specialised nozzle cleaning needles are inexpensive and should be part of every maker’s toolkit.
With the nozzle at printing temperature:
- Carefully insert the needle into the nozzle opening.
- Gently move it around to loosen debris.
- Purge filament afterwards to clear any remaining particles.
Take care when working around hot components.
4. Use Cleaning Filament
Cleaning filament is designed specifically for nozzle cleaning and material transitions.
It works particularly well when switching between materials such as:
- PLA to PETG
- PETG to ABS
- ABS to PLA
Running cleaning filament through the hotend after a cold pull can help remove stubborn residue.
5. Remove and Clean the Nozzle
If all else fails, removing the nozzle may be necessary.
Before removal:
- Heat the hotend to operating temperature.
- Carefully hold the heater block while loosening the nozzle.
Once removed:
- Soak the nozzle according to the manufacturer’s recommendations.
- Use a cleaning needle to clear softened residue.
- Reinstall the nozzle while the hotend is hot to ensure a proper seal.
6. Replace the Nozzle
Sometimes replacement is simply the most practical solution.
Nozzles are consumable components and relatively inexpensive. If you’ve spent more time cleaning than printing, a fresh nozzle may be the best investment.
How to Fix Heat Creep
If you suspect heat creep rather than a traditional nozzle blockage:
Check the Hotend Fan
A failed cooling fan is one of the most common causes of heat creep.
Inspect for:
- Fan failure
- Dust build-up
- Obstructed airflow
- Loose wiring
Remove the Jam
Allow the hotend to cool completely before attempting to pull the filament out manually.
If necessary, perform a cold pull to remove softened material from the heat break.
Solve the Root Cause
Recurring heat creep usually indicates a cooling issue that must be addressed. Clearing the clog without fixing airflow problems often results in the blockage returning.
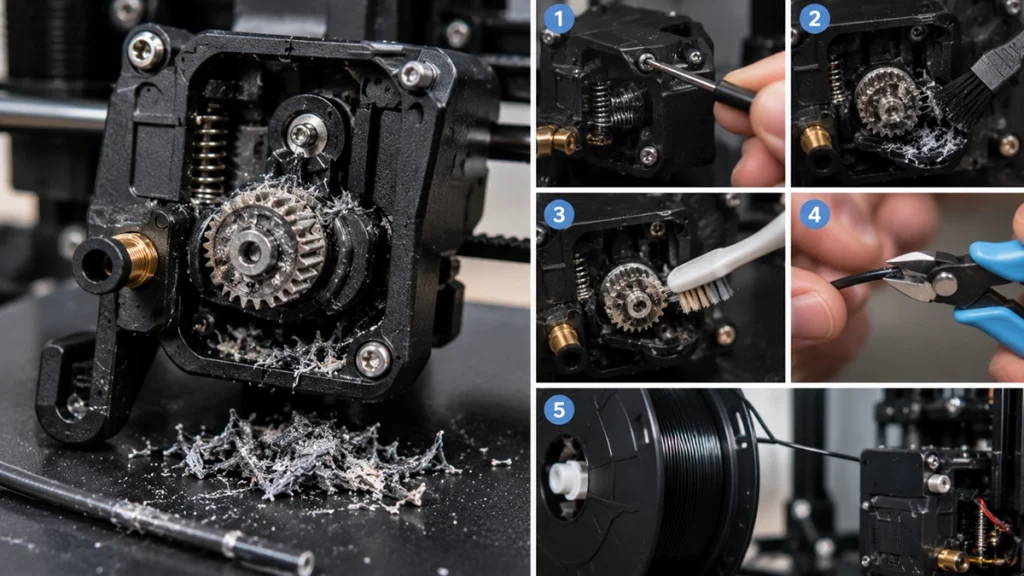
Clearing Extruder Grinding and Filament Jams
Sometimes the nozzle isn’t completely blocked, but the extruder has ground away part of the filament.
This happens when the extruder motor continues trying to push filament against excessive resistance.
To fix it:
- Open the extruder assembly.
- Remove filament debris from the drive gear.
- Clean the gear teeth thoroughly.
- Trim damaged filament.
- Reload fresh filament.
A clean extruder helps maintain consistent pressure and reduces the risk of future clogs.
How to Prevent Nozzle Clogs
The best nozzle cleaning routine is the one you rarely need because your printer stays healthy.
Use Quality Filament
Low-quality filament often contains contaminants or inconsistent diameters that increase clogging risk.
Premium filament offers:
- Better diameter consistency
- Cleaner raw materials
- More reliable extrusion
The small extra cost is often worth it.
Store Filament Properly
Moisture is one of the biggest enemies of successful 3D printing.
Wet filament can:
- Create steam bubbles
- Cause inconsistent extrusion
- Leave residue inside the hotend
Store spools in sealed containers with desiccant and dry filament when necessary.
Print at the Correct Temperature
Printing too hot can carbonise material inside the nozzle.
Printing too cold increases pressure and may lead to jams.
Always stay within the filament manufacturer’s recommended temperature range.
Avoid Leaving Filament Sitting in a Hot Nozzle
When filament remains stationary at printing temperature for extended periods, it can degrade and harden.
If you’re stepping away from the printer:
- Lower the nozzle temperature
- Use idle temperature settings
- Unload filament if necessary
This is especially important when printing speciality filaments.
Use the Correct Nozzle
Abrasive materials such as:
- Carbon fibre filaments
- Glow-in-the-dark filaments
- Metal-filled filaments
can rapidly wear brass nozzles.
For these materials, a hardened steel nozzle is strongly recommended.
Purge Thoroughly Between Materials
Material residue is a common cause of contamination-related clogs.
Whenever changing filament types:
- Purge at the higher temperature of the two materials
- Extrude at least 50–100mm of fresh filament
- Ensure the previous material has been fully removed
Maintain Your Extruder
Routine 3D printing maintenance should include:
- Cleaning drive gears
- Inspecting PTFE tubes
- Checking tension settings
- Replacing worn components
A healthy extruder reduces the chance of minor restrictions becoming major clogs.
Perform Preventive Cold Pulls
Many experienced makers perform a cold pull every 20–30 printing hours.
This simple maintenance habit helps remove residue before it develops into a blockage.
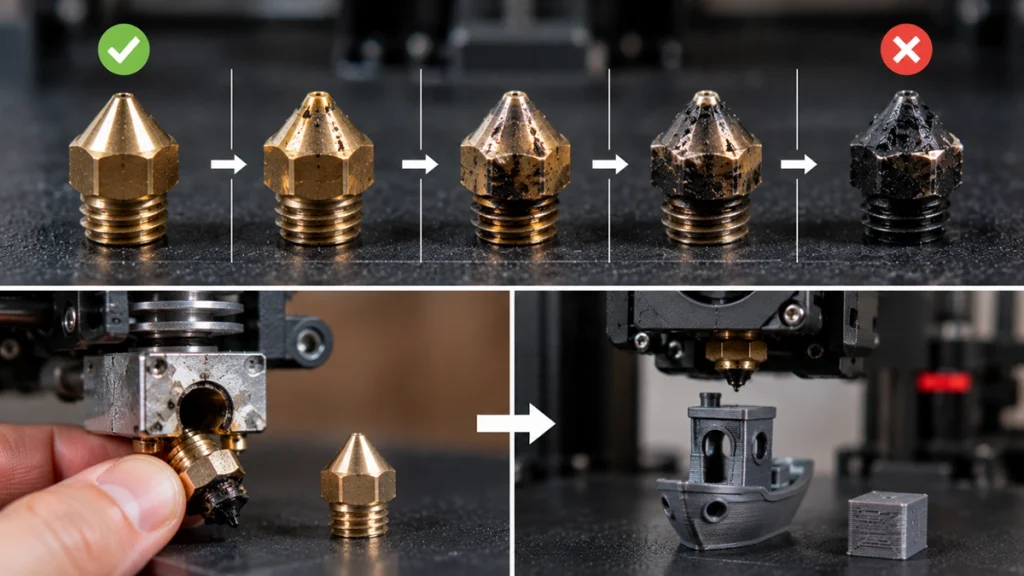
When Should You Replace Your Nozzle?
Even with excellent maintenance, nozzles eventually wear out.
Consider nozzle replacement if you experience:
- Persistent under-extrusion
- Repeated clogging
- Visible nozzle wear
- Inconsistent extrusion
- Reduced print quality despite troubleshooting
Replacing a worn nozzle is often the quickest way to restore print quality and reliability.
Final Thoughts
A clogged 3D printer nozzle can bring a print to a halt, but it’s rarely a disaster. Most blockages can be diagnosed quickly and cleared using simple maintenance techniques such as cold pulls, cleaning needles, or nozzle replacement.
More importantly, many clogs can be avoided altogether through good printing habits. Using quality filament, storing it correctly, maintaining your hotend, and performing occasional preventive cleaning will keep your printer running smoothly and reduce downtime.
If you’re experiencing frequent clogs, it may be time to inspect your nozzle, hotend, cooling system, and filament storage practices. A little preventative maintenance today can save hours of troubleshooting tomorrow.