
When it comes to 3D printing, many beginners focus on the model itself—design, dimensions, and material choice. But one of the most important (and often overlooked) decisions happens before the print even starts: Print Orientation.
Simply put, print orientation is how your model is positioned on the build plate. This single choice can dramatically influence your part’s strength, surface finish, support requirements, and even how long the print takes.
Whether you’re running a small home setup or a full 3D Print Lab, understanding how print orientation affects strength, finish, and print time can save you hours of frustration—and money on failed prints.
Let’s break it down.
What Is Print Orientation (And Why It Matters)?
Print orientation refers to the direction your model faces during printing. Think of it as deciding whether your object lies flat, stands upright, or sits at an angle.
This matters because most 3D printers—especially FDM printers—build objects layer by layer. Each layer is bonded to the one below it, and that bond is not as strong as the material itself.
This leads us to a key concept: anisotropy.
Strength: Why Layer Direction Is Everything
FDM prints are anisotropic, meaning they have different strength properties depending on direction.
- Strongest direction: Along the filament lines (within the same layer)
- Weakest direction: Between layers (layer adhesion)
What This Means in Practice
If your part is going to experience force, you want that force to run along the layers, not across them.
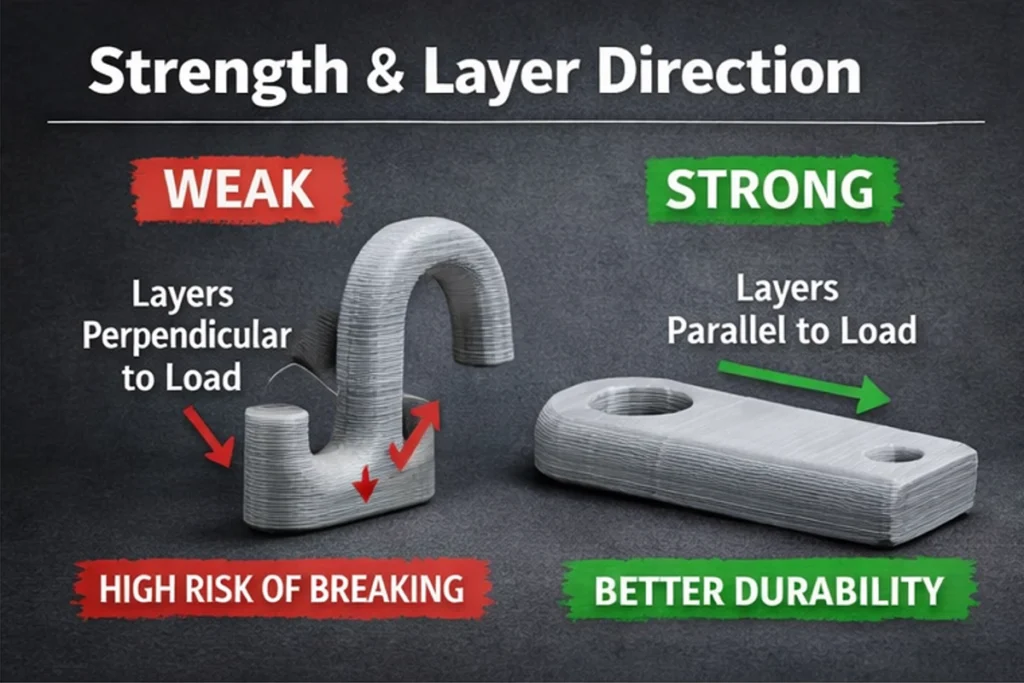
Example
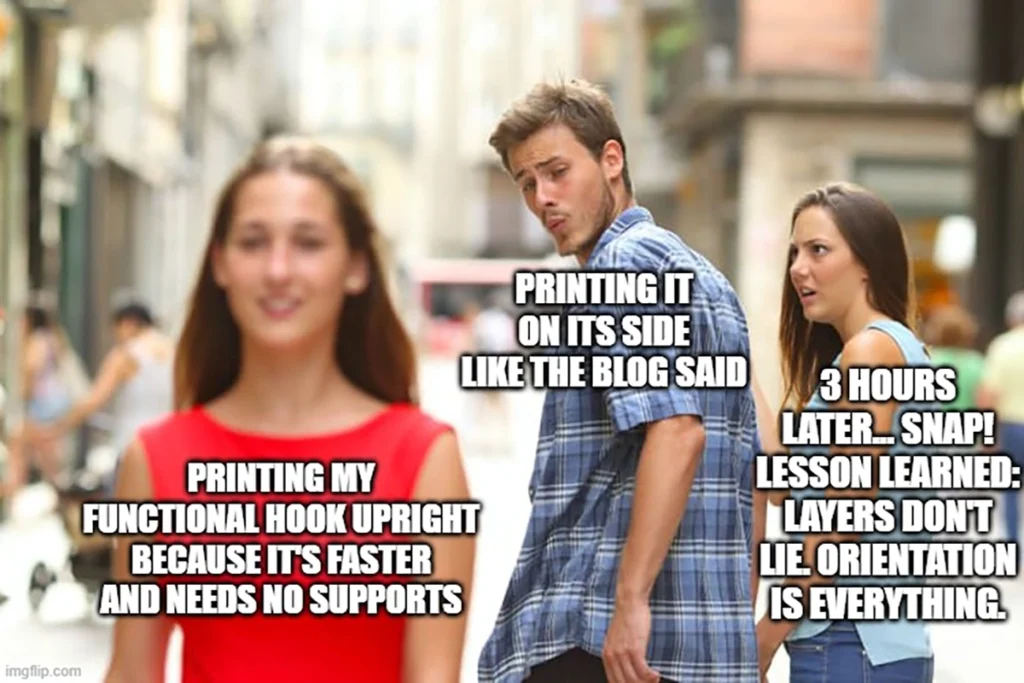
Imagine printing a hook:
- Bad orientation: Printed upright
→ The load pulls against the layers
→ High chance of snapping at layer lines - Better orientation: Printed on its side
→ Load runs along the filament paths
→ Much stronger and more durable
Pro Tip
Before printing, ask yourself:
👉 Where will the stress or force be applied?
Then orient your model so that the force is parallel to the layers.
Surface Finish: Getting That Clean Look
Print orientation also plays a massive role in how your final part looks.
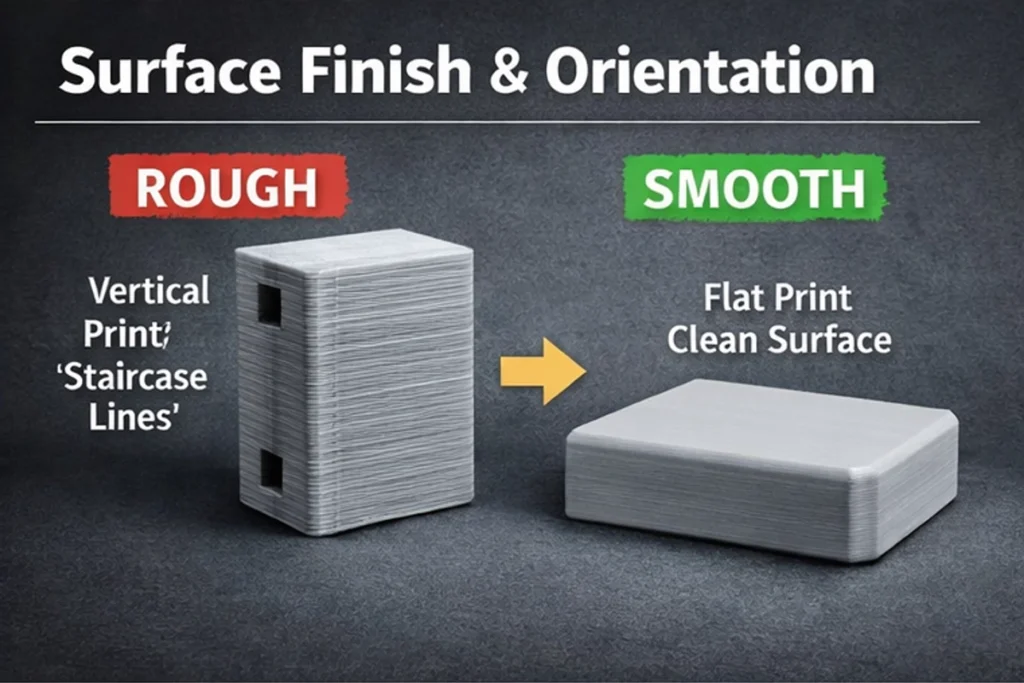
The “Staircase Effect”
Layer-based printing creates visible lines, especially on:
- Curved surfaces
- Angled faces
- Vertical slopes
This is known as the staircase effect.
How Orientation Helps
- Flat surfaces printed parallel to the build plate come out smooth
- Angled surfaces show more visible layer lines
Example
If you’re printing a product enclosure with a visible front face:
- Best approach: Place the front face flat on the bed
→ Smooth finish
→ Minimal post-processing - Worst approach: Print it vertically
→ Visible layer lines
→ More sanding required
Pro Tip
Prioritise the surfaces people will see or touch.
Orientation can reduce (or eliminate) the need for sanding, priming, or painting.
Print Time: Speed vs Efficiency
Another major factor in how print orientation affects strength, finish, and print time is the height of the model.
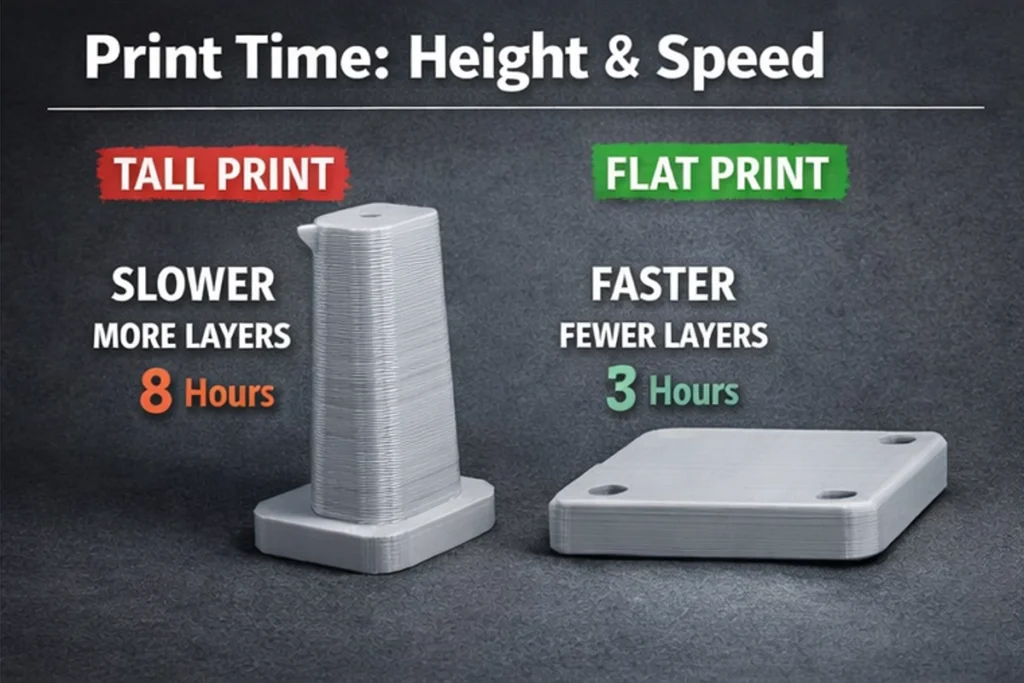
Why Height Matters
3D printers work layer by layer. More height = more layers.
- Taller prints:
→ More layers
→ Longer print times - Flatter prints:
→ Fewer layers
→ Faster prints
But There’s a Catch…
Laying a part flat can sometimes increase the need for supports.
Support Material: The Hidden Trade-Off
Supports are extra structures printed to hold up overhangs.
While sometimes necessary, they come with downsides:
- Extra material usage
- Longer print time
- More post-processing (removal and cleanup)
- Possible surface damage
Balancing Act
You need to find the sweet spot between:
- Minimising height (for faster prints)
- Reducing supports (for cleaner results)
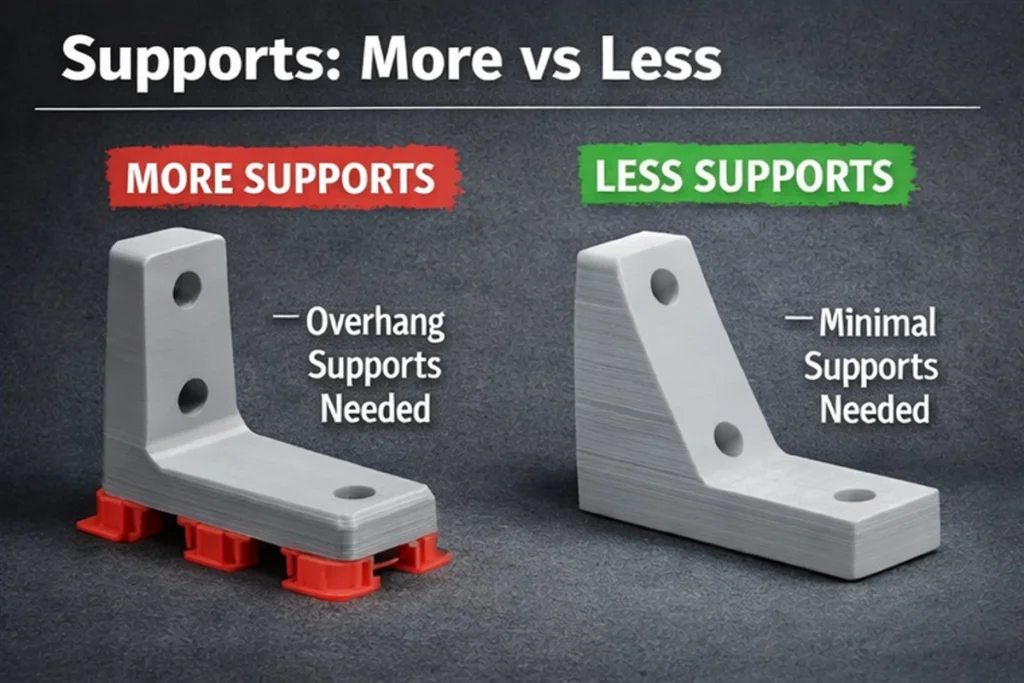
Example
Printing an L-shaped bracket:
- Flat orientation:
→ Faster print
→ Requires supports under the overhang - Angled orientation:
→ Slightly longer print
→ Minimal or no supports
Pro Tip
Sometimes a slightly longer print is worth it if it saves you time on cleanup.
Practical Tips for Choosing the Best Orientation
Here’s a simple checklist you can use before every print:
1. Identify Load Paths
Where will the part experience stress?
- Align layers with the direction of force
- Avoid stress across layer lines
2. Prioritise Cosmetic Surfaces
Which parts need to look good?
- Place visible faces flat
- Hide layer lines where possible
3. Minimise Supports
Supports cost time and material.
- Rotate or angle the model to reduce overhangs
- Use natural geometry to your advantage
4. Reduce Print Height
Shorter prints are faster and often more reliable.
- Lay parts flat when possible
- Watch out for increased supports
5. Test Small Versions
If unsure:
- Print a scaled-down version
- Compare strength and finish
- Adjust before committing to a full print
Real-Life Example: Functional Part vs Display Model
Let’s look at two common use cases in a 3D Print Lab.
Case 1: Functional Bracket
- Needs to handle weight
- Strength is the priority
Best orientation:
- Layers aligned with load direction
- May sacrifice appearance
Result:
- Strong, durable part
- Longer lifespan
Case 2: Display Figurine
- Focus on visual quality
- Minimal structural load
Best orientation:
- Angled to reduce visible layer lines
- Supports placed in hidden areas
Result:
- Cleaner finish
- Less post-processing
Common Mistakes to Avoid
Even experienced makers slip up sometimes. Watch out for these:
- Ignoring strength direction
→ Leads to weak, brittle parts - Overusing supports
→ Wastes material and time - Choosing speed over quality
→ Results in poor finish - Not previewing the print
→ Always check slicing software before printing
FAQs
What is the best print orientation for strength?
The best orientation aligns the layers with the direction of force. Avoid placing stress across layer lines, as this is where parts are weakest.
Does print orientation really affect print time?
Yes, significantly. Taller prints require more layers, which increases print time. A flatter orientation can speed things up, but may require more support.
How do I reduce layer lines?
- Print important surfaces flat
- Use smaller layer heights
- Adjust orientation to minimise visible slopes
Should I always avoid supports?
Not always. Supports are sometimes necessary. The goal is to minimise, not eliminate them entirely.
Is there a “perfect” orientation?
No single orientation is perfect. It’s always a trade-off between:
- Strength
- Finish
- Print time
- Material usage
Conclusion: Mastering Print Orientation
Understanding Print Orientation is one of the most powerful ways to improve your 3D printing results.
It directly impacts:
- How strong your part is
- How good it looks
- How long it takes to print
By thinking ahead and making small adjustments, you can dramatically improve both quality and efficiency—whether you’re printing at home or running a professional 3D Print Lab.
Ready to Take Your Prints to the Next Level?
If you want stronger parts, cleaner finishes, and more efficient prints, mastering print orientation is just the beginning.
Explore more guides, tips, and professional 3D printing services to level up your workflow—or get in touch to see how expert optimisation can save you time and money on your next project
