Extrusion is one of the most important factors affecting the quality of a 3D print. If your printer is not depositing the correct amount of filament, even the best-designed models can turn into weak, messy, or inaccurate prints.
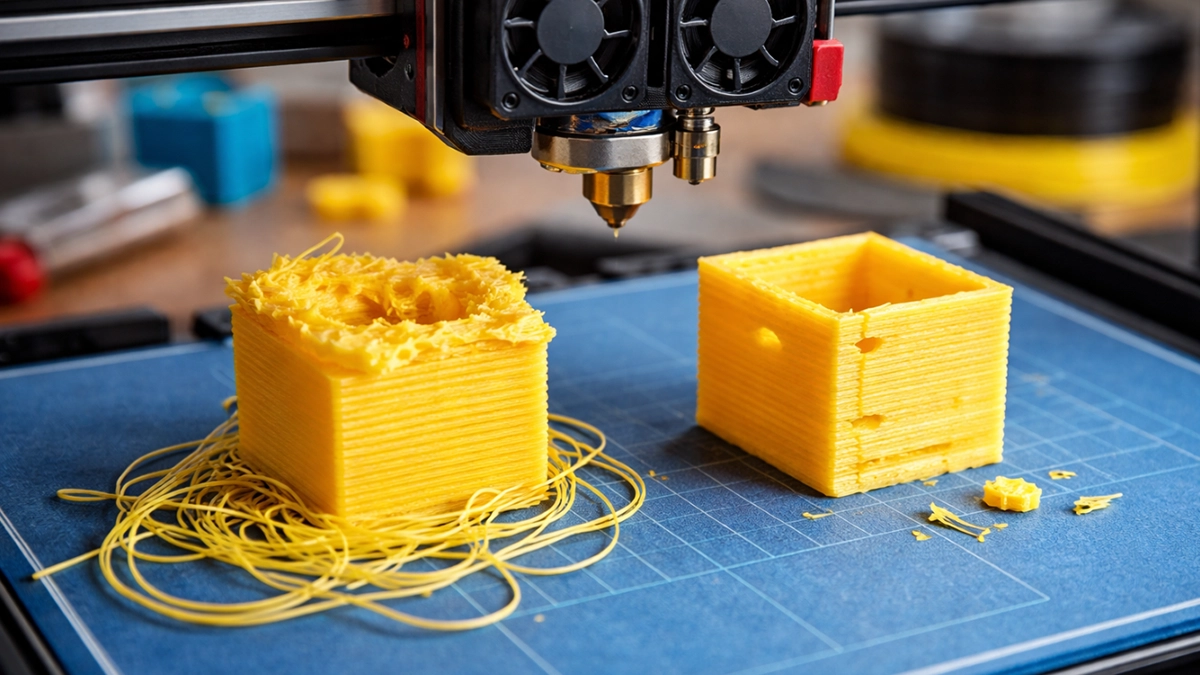
Two of the most common issues 3D printing enthusiasts face are under-extrusion and over-extrusion. Both problems stem from incorrect filament flow, but they show up in very different ways.
In this guide, we’ll explain under-extrusion vs over-extrusion, how to identify each problem, what causes them, and how to fix them so you can achieve stronger, cleaner, and more accurate prints.
What Is Extrusion in 3D Printing?
Extrusion refers to the process where the extruder pushes filament through the heated nozzle, depositing melted plastic layer by layer to build a model.
For a print to come out correctly, the printer must extrude exactly the right amount of material. If the printer pushes too little filament, you’ll get under-extrusion. If it pushes too much, you’ll see over-extrusion.
Both problems can affect:
- Print strength
- Surface finish
- Dimensional accuracy
- Layer adhesion
Understanding how to spot and correct these issues is a key part of improving your 3D printing quality.
Under-Extrusion in 3D Printing
What Is Under-Extrusion?
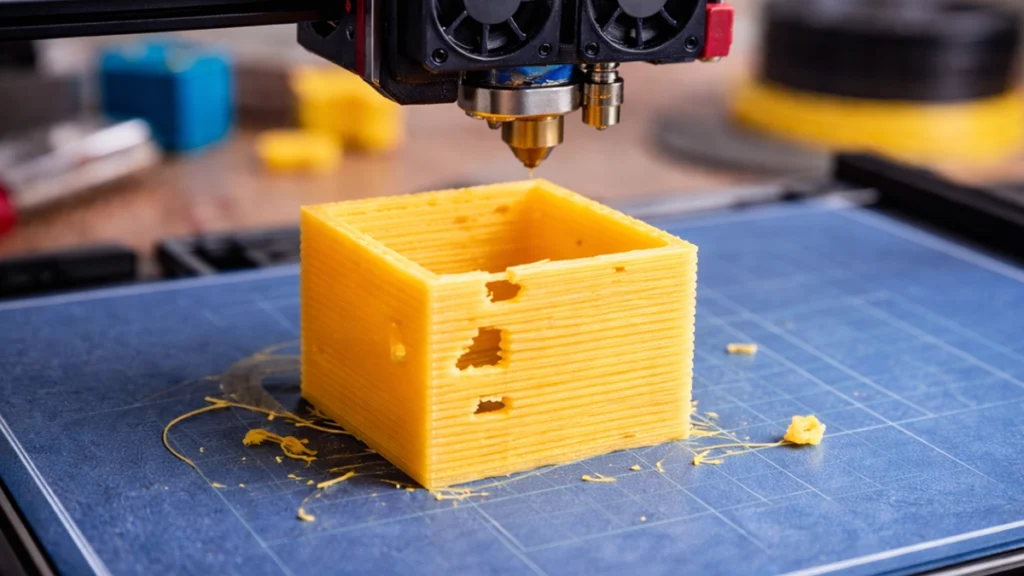
Under-extrusion occurs when the printer does not push enough filament through the nozzle. This means each layer receives less plastic than required, resulting in weak or incomplete parts.
Under-extrusion is often easy to spot once you know what to look for.
Signs of Under-Extrusion
Common under-extrusion symptoms include:
1. Gaps in Walls or Top Layers
You may notice visible spaces between printed lines or incomplete top surfaces.
2. Weak or Sparse Infill
Infill patterns may appear thin, broken, or inconsistent.
3. Poor Layer Adhesion
Layers may separate easily, making parts brittle and weak.
4. Visible Holes or Missing Sections
In severe cases, entire sections of the model may be missing.
5. Rough or Stringy Surface Texture
Printed layers may look inconsistent or rough.
If your prints look fragile or incomplete, under-extrusion is often the cause.
Common Causes of Under-Extrusion
Several factors can cause under-extrusion in 3D printing.
Partial Nozzle Clogs
Small bits of burnt filament, dust, or debris can restrict flow through the nozzle.
Even a partially clogged nozzle can dramatically reduce extrusion.
Filament Slipping in the Extruder
If the extruder gear cannot grip the filament properly, it will struggle to push filament into the hotend.
You may even hear a clicking sound from the extruder motor.
Incorrect Filament Diameter Settings
If your slicer is configured for the wrong filament diameter, the printer may calculate the wrong extrusion amount.
Extruder Tension Too Low
If the extruder idler tension is too loose, the drive gear cannot push filament effectively.
Nozzle Temperature Too Low
If the nozzle temperature is below the recommended range for the material, the filament may not melt fast enough to flow smoothly.
How to Fix Under-Extrusion
Fortunately, most under-extrusion problems are relatively easy to fix.
Perform a Cold Pull
A cold pull is one of the most effective ways to clear partial nozzle clogs.
This process pulls softened filament through the nozzle to remove debris or burnt plastic.
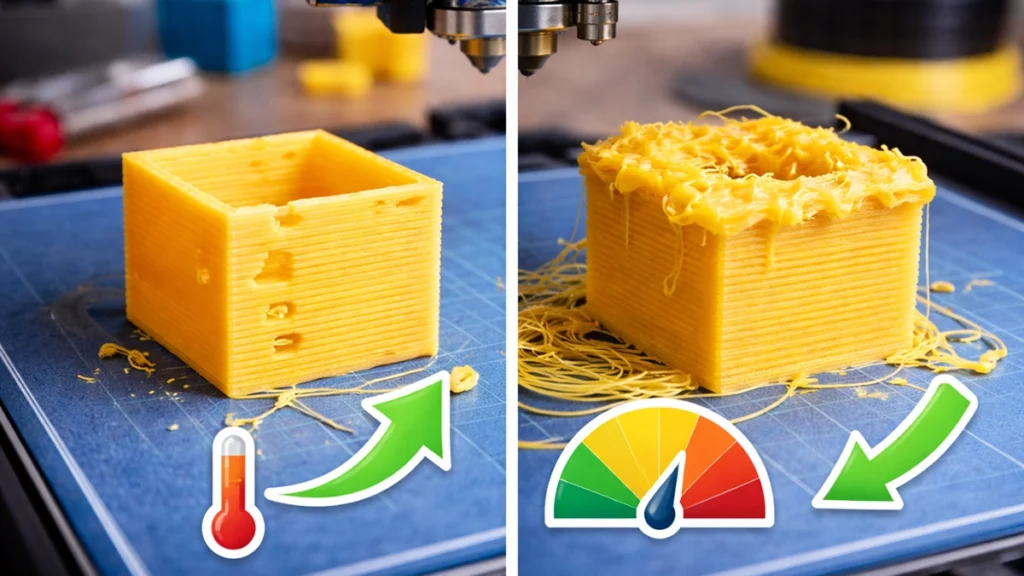
Increase Nozzle Temperature
Try increasing the nozzle temperature in small increments of 5°C.
Higher temperatures improve filament flow, especially for materials like PETG or ABS.
Adjust Extruder Tension
Tighten the extruder idler slightly so the filament is gripped firmly.
Be careful not to overtighten, as this can damage the filament.
Check Filament Diameter
Use digital callipers to measure the filament diameter at several points.
Then enter the correct value into your slicer settings.
Inspect the Extruder Gear
Clean any debris from the drive gear teeth so it can grip the filament properly.
Over-Extrusion in 3D Printing
What Is Over-Extrusion?
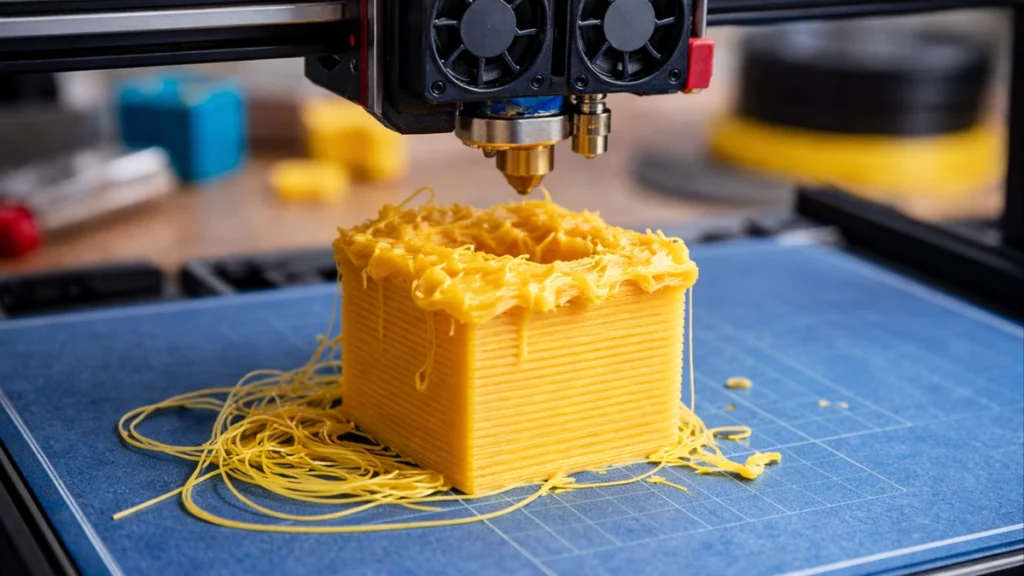
Over-extrusion happens when the printer pushes too much filament through the nozzle.
Instead of clean layers, excess plastic builds up on the surface of the model.
While under-extrusion causes weak prints, over-extrusion typically results in messy or inaccurate prints.
Signs of Over-Extrusion
Here are the most common over-extrusion symptoms.
Blobs and Surface Roughness
Extra plastic accumulates on the outer walls, creating a rough texture.
Dimensional Inaccuracies
Parts may come out slightly larger than intended.
This is especially noticeable when printing mechanical components or tight-fitting parts.
Excess Stringing
Too much melted plastic can create strings between print moves.
Bulging Corners or Walls
Corners may appear rounded or swollen instead of sharp and clean.
Poor Surface Finish
Fine details may become less defined due to excess material.
Common Causes of Over-Extrusion
There are several typical causes of over-extrusion in 3D printing.
Flow Rate or Extrusion Multiplier Too High
The flow rate setting in your slicer controls how much filament is extruded.
If the flow rate is too high, the printer deposits excess plastic.
Incorrect Filament Diameter
If the slicer thinks your filament is thinner than it actually is, it will extrude more material than necessary.
Nozzle Temperature Too High
Higher temperatures make the filament more fluid.
This can cause plastic to flow too easily and lead to excess extrusion.
Incorrect Extruder Calibration
If your extruder steps per millimetre (E-steps) are not calibrated correctly, the printer may push too much filament.
How to Fix Over-Extrusion
Correcting over-extrusion problems usually involves adjusting slicer settings.
Reduce Flow Rate
Lower the flow rate or extrusion multiplier in small increments.
Most users reduce it by 2–5% at a time until print quality improves.
Check Filament Diameter Settings
Confirm the filament diameter entered in your slicer matches the actual filament.
Most standard filaments are 1.75 mm, but they can vary slightly.
Lower Nozzle Temperature
If the temperature is too high, reduce it by 5–10°C while staying within the filament manufacturer’s recommended range.
Calibrate Your Extruder
If over-extrusion persists, calibrating the extruder E-steps can significantly improve accuracy.
Calibration Best Practices for Perfect Extrusion
Fine-tuning extrusion requires proper calibration. A few simple test prints can make a big difference.
Print Calibration Cubes
Calibration cubes are small test models used to measure dimensional accuracy.
If the cube prints larger than expected, over-extrusion may be the cause.
Use Single-Wall Test Prints
Single-wall prints help you measure the actual wall thickness compared to the expected thickness in the slicer.
If the wall is thicker than expected, your flow rate is likely too high.
Measure with Callipers
Using digital calipers to measure printed parts allows you to make precise adjustments to your slicer settings.
Small changes can significantly improve print quality.
Under-Extrusion vs Over-Extrusion: Quick Comparison
| Issue | Under-Extrusion | Over-Extrusion |
|---|---|---|
| Plastic Flow | Too little filament | Too much filament |
| Print Strength | Weak and brittle | Strong but messy |
| Surface Quality | Gaps and holes | Blobs and rough texture |
| Dimensional Accuracy | Parts may be undersized | Parts may be oversized |
| Common Fix | Increase flow or temperature | Reduce flow or temperature |
Final Thoughts
Getting extrusion settings right is one of the most important steps in improving 3D printing quality.
Both under-extrusion and over-extrusion can ruin an otherwise perfect print, but the good news is that they are usually straightforward to diagnose and fix.
By checking your nozzle condition, filament settings, temperature, and flow rate, you can quickly resolve most extrusion issues.
Regular calibration, proper filament measurement, and small slicer adjustments will go a long way toward producing stronger, cleaner, and more dimensionally accurate prints. If you’re serious about improving your prints, learning how to identify under-extrusion vs over-extrusion is a skill every maker should master.

