If you’ve spent hours on a print only to find the corners lifting off the bed, you’re not alone. 3D print warping is one of the most common frustrations in FDM printing. It can turn an otherwise perfect model into a warped mess – or worse, cause a complete print failure halfway through.
The good news? Warping is preventable.
In this guide, we’ll break down the causes of 3D print warping, how to prevent it, and practical, real-world fixes you can apply immediately.
What Is 3D Print Warping?
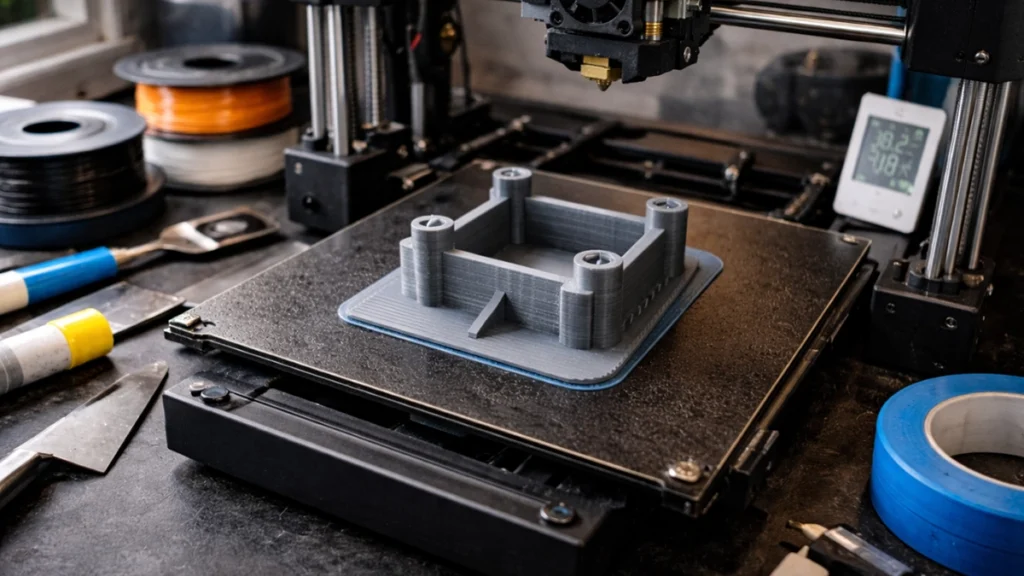
Warping happens when the edges or corners of a print lift away from the build plate during printing. Instead of staying flat and bonded to the surface, the model curls upwards.
This affects:
- Dimensional accuracy
- Surface quality
- Structural integrity
- Overall print success
Understanding why prints warp is the first step toward fixing the problem for good.
The Primary Cause of 3D Print Warping: Uneven Cooling
At its core, warping is a thermal issue.
When filament is extruded, it’s heated to a high temperature. As it cools and solidifies, it shrinks slightly. If that cooling happens unevenly — for example, if the outer edges cool faster than the centre — internal stresses build up.
Those stresses pull at the corners of your model, causing them to lift from the bed.
This is why controlling temperature is critical in preventing 3D print warping.
Common Causes of Warping in FDM Printing
Let’s look at the most common contributors to warped prints.
1. Poor First Layer Adhesion
If your first layer doesn’t stick properly, warping becomes much more likely.
Common causes of poor adhesion include:
- Incorrect bed levelling
- Nozzle height set too high
- Dirty or oily build surface
- Incorrect first layer settings
Your first layer is the foundation of the entire print. If it fails, everything above it is compromised.
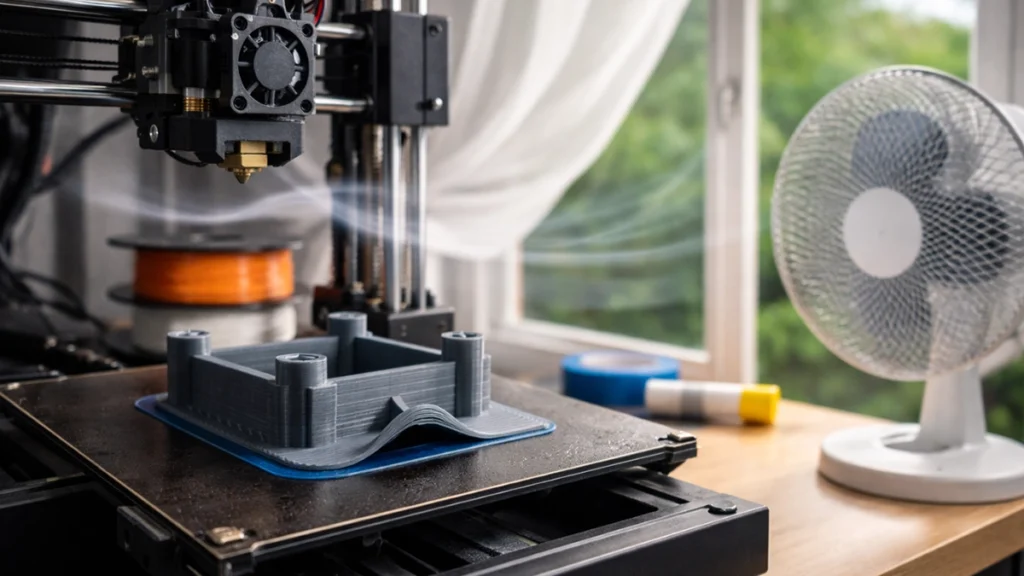
2. Drafts and Environmental Changes
Even a small draft can cool one side of your print faster than the other.
Placing your printer near:
- Open windows
- Air conditioners
- Fans
- Frequently opened doors
can cause uneven cooling, which leads directly to lifting corners.
Environmental control is often overlooked, but it plays a major role in preventing print warping.
3. Material Shrinkage (ABS and Nylon Are Notorious)
Some filaments are more prone to warping than others.
High-shrink materials include:
- ABS
- Nylon
- Polycarbonate
These materials contract more as they cool, which increases internal stress.
PLA, by contrast, has much lower shrinkage and is generally easier to manage.
If you’re struggling with ABS warping or Nylon lifting off the bed, temperature control becomes even more important.
4. Incorrect Slicer Settings
Your slicer can either help or hurt your print.
Problematic settings include:
- Printing the first layer too fast
- Aggressive part cooling early on
- Bed temperature set too low
- Insufficient first-layer extrusion
Dialling in your slicer is one of the easiest ways to reduce warping issues.
How to Prevent 3D Print Warping
Now let’s move on to practical prevention strategies.
Improve Bed Adhesion
Stronger adhesion equals less lifting.
Here’s what helps:
Clean your bed properly
Use isopropyl alcohol to remove oils and dust. Even fingerprints can reduce adhesion.
Level your bed accurately
Manual or auto bed levelling must ensure the nozzle is close enough for proper squish — but not so close that it blocks extrusion.
Adjust first layer settings
- Increase first layer extrusion width
- Slightly increase extrusion multiplier
- Slow down first layer speed
A slower first layer gives the filament more time to bond.
Use adhesion aids
Depending on your build surface, you can use:
- Glue stick
- Hairspray
- Painter’s tape
- PEI sheets
- BuildTak-style surfaces
Each setup behaves differently, so test what works best for your machine.
Optimise Temperature Settings
Temperature is everything when it comes to warping.
Use the correct heated bed temperature
Different materials require different settings:
- PLA: typically 50–60°C
- ABS: typically 90–110°C
- Nylon: often 70–100°C
If your bed is too cool, adhesion suffers.
Reduce part cooling in early layers
For materials like ABS and Nylon, disable or reduce cooling for the first few layers. Rapid cooling increases shrinkage and stress.
Gradual cooling is your friend.
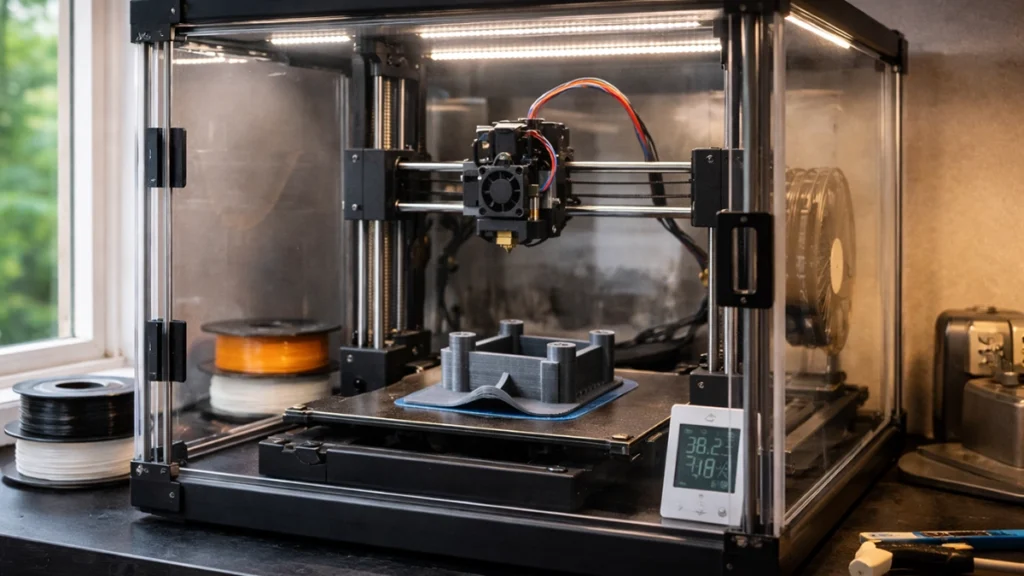
Control the Printing Environment
This is where many users see dramatic improvements.
Use an enclosure
An enclosure maintains a stable ambient temperature and shields prints from drafts.
For ABS especially, an enclosure can be the difference between success and failure.
Avoid temperature fluctuations
Don’t place your printer near open windows or air vents.
In South Africa, where temperatures can swing significantly between day and night, ambient stability matters more than many realise.
Adjust Print Speed
Slowing things down can solve more problems than you’d expect.
- Reduce first layer speed
- Slightly lower overall print speed if lifting persists
Slower printing improves bonding and reduces stress.
If you’re troubleshooting persistent 3D printer adhesion problems, this is a quick setting to experiment with.
Real-World Fixes for Warped Prints
Even with prevention in place, sometimes warping still happens.
Here’s what to do.
Add a Brim
A brim adds extra material around the base of your model.
This increases surface contact with the bed and anchors the corners more securely.
Brims are especially helpful for:
- Tall prints
- Small footprint models
- ABS parts
They’re easy to remove and often solve lifting issues instantly.
Use a Raft (When Necessary)
A raft creates a thick base layer underneath your model.
It uses more material and affects surface finish, but for extreme cases, it can stabilise prints significantly.
If you’re printing functional parts that must succeed on the first attempt, a raft can be worth it.
Upgrade Your Build Surface
Sometimes the issue isn’t settings — it’s hardware.
Switching to:
- A textured PEI sheet
- Glass with adhesive
- A high-quality flexible build plate
can dramatically improve adhesion and reduce warping in 3D printing.
Choose Low-Warp Filaments
Some manufacturers offer filaments specifically formulated to reduce shrinkage.
If your project allows it, switching materials can eliminate ongoing frustration.
For example, PLA+ alternatives may give you strength with less warping than ABS.
Why Fixing Warping Matters
Warping isn’t just cosmetic.
It can cause:
- Dimensional inaccuracy
- Poor layer bonding
- Structural weakness
- Wasted filament
- Lost time
In production environments, repeated failures cost money.
Learning how to prevent 3D print warping saves both time and material in the long run.
Quick Warping Troubleshooting Checklist
If your prints keep lifting, run through this checklist:
- Is the bed clean?
- Is the bed levelled correctly?
- Is your nozzle height correct?
- Is the bed temperature appropriate for the filament?
- Is part cooling too aggressive?
- Are there drafts in the room?
- Have you tried adding a brim?
Systematically checking each variable usually reveals the culprit.
Final Thoughts
3D print warping is frustrating — but it’s rarely random.
It almost always comes down to:
- Thermal control
- First layer adhesion
- Environmental stability
Once you understand how temperature, material shrinkage, and bed adhesion interact, preventing warped prints becomes far more manageable.
With the right setup and a bit of fine-tuning, you can dramatically reduce failed prints and enjoy smoother, more reliable results.
And that means less wasted filament, less time reprinting… and far more satisfying finished parts.