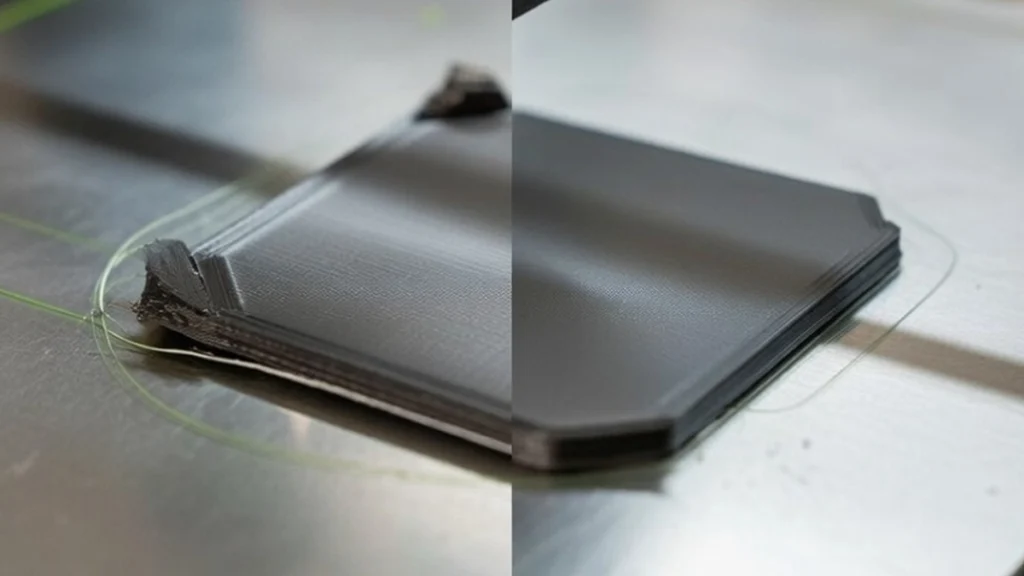
Few things are more frustrating than watching a print start perfectly… only to see the corners curl up like a sad slice of toast.
If you’ve dealt with 3D print warping, you’ve probably noticed it almost always starts at the corners. Not the middle. Not a random edge. The corners. And that’s not bad luck — it’s physics.
Let’s break down why this happens and what you can do to stop your prints from peeling off the bed before they’re even halfway done.
The Short Answer: Corners Are Under the Most Stress
Corner lifting in 3D printing happens because of a combination of:
- Thermal contraction
- Uneven cooling
- Part geometry
- Weak bed adhesion
Together, these forces pull the corners upward before the rest of the model has a chance to move.
Understanding this helps you fix the root cause instead of just hoping a glue stick saves the day.
1. Thermal Contraction: Plastic Shrinks as It Cool
All common 3D printing materials — PLA, PETG, ABS, Nylon — shrink as they cool. This is called thermal contraction, and it’s the main driver behind 3D printing warping.
When filament leaves the nozzle, it’s hot and slightly expanded. As it cools, it wants to contract. But the bottom layers are stuck to the build plate, so they can’t move freely.
This creates internal stress inside the print.
Eventually, something has to give.
And most of the time, that “something” is your corners.
2. Corners Cool Faster Than the Centre
Temperature inside a print isn’t perfectly even. The outer edges — especially corners — are more exposed to airflow and ambient temperature.
That means they:
- Cool faster
- Shrink sooner
- Start pulling inward earlier than the rest of the model
This creates a tug-of-war between the cooling corners and the still-warm centre. The corners begin to curl upward, and once they lose contact with the bed, the problem accelerates.
That’s why corners lifting in 3D prints is often the first visible sign of a warping issue.
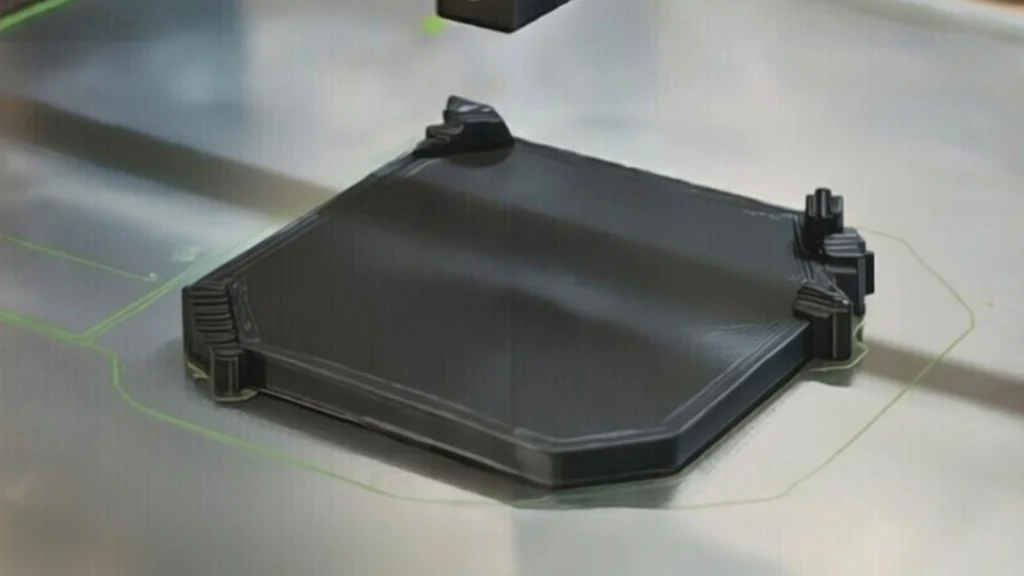
3. Geometry Works Against You
Corners are also structurally weaker when it comes to resisting lifting forces.
Think about the bottom of a square print:
- The centre area has lots of surface contact with the bed
- A corner only has a small patch of plastic holding it down
Less contact area = less grip.
So when internal stress builds up, corners are simply easier to peel away. Sharp 90° corners are especially prone to this, while rounded shapes tend to behave better.
This is why large, boxy models are more likely to suffer from bed adhesion issues in 3D printing than circular or organic shapes.
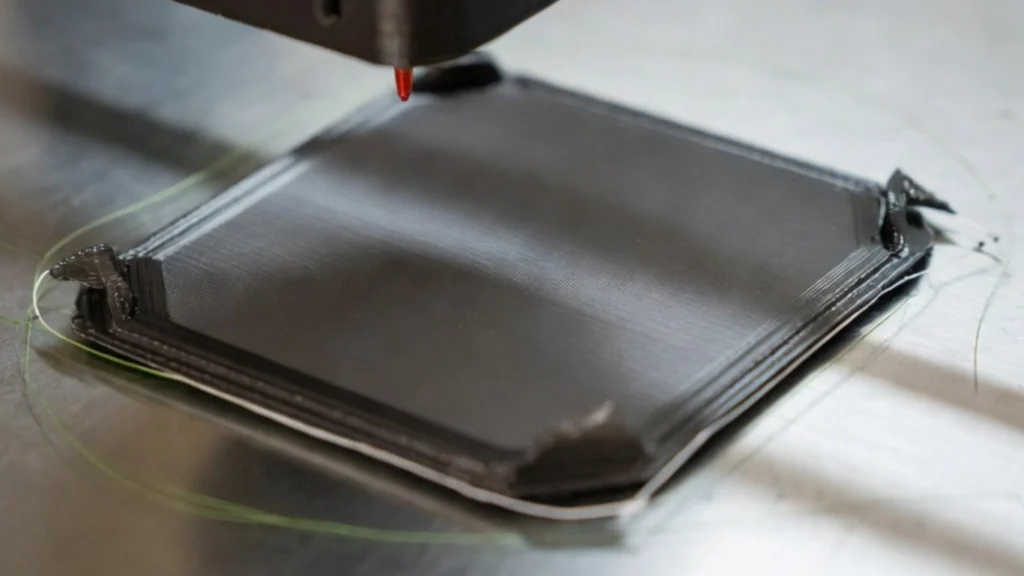
How to Spot Corner Lift Early
Catching the issue quickly can save a long print.
Look out for:
- Corners of the first few layers peeling upward
- A slight gap forming between the bed and the edge of the print
- Nozzle dragging across a lifted corner later in the print
- Warping that starts small and spreads inward
If you see this happening, it’s not just “bad luck” — it’s a cooling and stress problem that needs adjusting.
How to Stop Corners from Lifting
Now for the practical fixes. The goal is to reduce internal stress, slow down cooling, and improve grip between the print and the bed.
Improve Bed Adhesion
Strong bed adhesion in 3D printing is your first line of defence.
Make sure:
- Your bed is properly levelled
- Your first layer is slightly squished, not just laid on top
- The bed surface is clean (isopropyl alcohol works well)
You can also use:
- Glue stick
- Hairspray (lightly applied)
- PEI sheets
- Textured build surfaces
If the first layer isn’t gripping properly, the corners don’t stand a chance once shrinkage begins.
Optimise First Layer Settings
Your first layer settings can make or break a print.
Try:
- Increasing first layer extrusion width (110–120%)
- Slowing first layer speed
- Increasing first layer temperature by 5–10 °C
More plastic and better flow means more surface contact — and more resistance against lifting forces.
Control Cooling in Early Layers
Cooling too fast is a major cause of 3D print warping.
In your slicer:
- Reduce part cooling fan speed for the first 3–5 layers
- For ABS, Nylon, or PETG, consider turning the fan off initially
- Avoid strong drafts near your printer
Slower cooling = less aggressive shrinkage = less stress pulling at the corners.
Use a Brim or Raft
If corners keep lifting, add more surface area.
Brim vs Raft in 3D Printing
A brim adds extra lines around the base of your model. It increases contact area without affecting the underside much. This is often enough to stop corners lifting.
A raft builds a thicker, sacrificial base under the entire model. It’s more material and cleanup, but great for stubborn warping.
For most cases of corners lifting in 3D prints, a 5–10 line brim is a quick and effective fix.
Raise Bed Temperature (Within Limits)
A warmer bed keeps the bottom layers from cooling too quickly.
Typical ranges:
- PLA: 55–65 °C
- PETG: 70–85 °C
- ABS: 95–110 °C
A slightly hotter bed helps reduce the temperature difference between layers, lowering internal stress.
Use an Enclosure for High-Warp Materials
If you regularly print ABS, Nylon, or other high-shrink materials, a 3D printer enclosure can make a massive difference.
An enclosure:
- Keeps ambient temperature stable
- Reduces drafts
- Slows down overall cooling
This dramatically reduces cooling gradients that cause corners to lift first.
A Quick Real-World Fix
Let’s say you’re printing a small rectangular box and the corners keep peeling up.
Try this combo:
- Add a 6-line brim
- Increase first layer temp by 5 °C
- Reduce cooling fan to 20% for the first 5 layers
- Slow first layer speed
You’ve now:
- Increased bed adhesion
- Reduced cooling speed
- Spread stress over a larger area
That’s often all it takes to eliminate corner lift.
The Big Picture
Corner lifting isn’t random. It’s a predictable result of thermal contraction in 3D printing, uneven cooling, and geometry working against you.
Because corners cool faster and have less surface area holding them down, they’re the first place stress shows up. Once they lift, the rest of the print can follow.
The good news? With better first layer settings, improved bed adhesion, smarter cooling control, and tools like brims or enclosures, you can prevent most cases of 3D printing warping before they start.
And that means flatter prints, fewer failures, and a lot less frustration watching your corners curl up mid-print.