
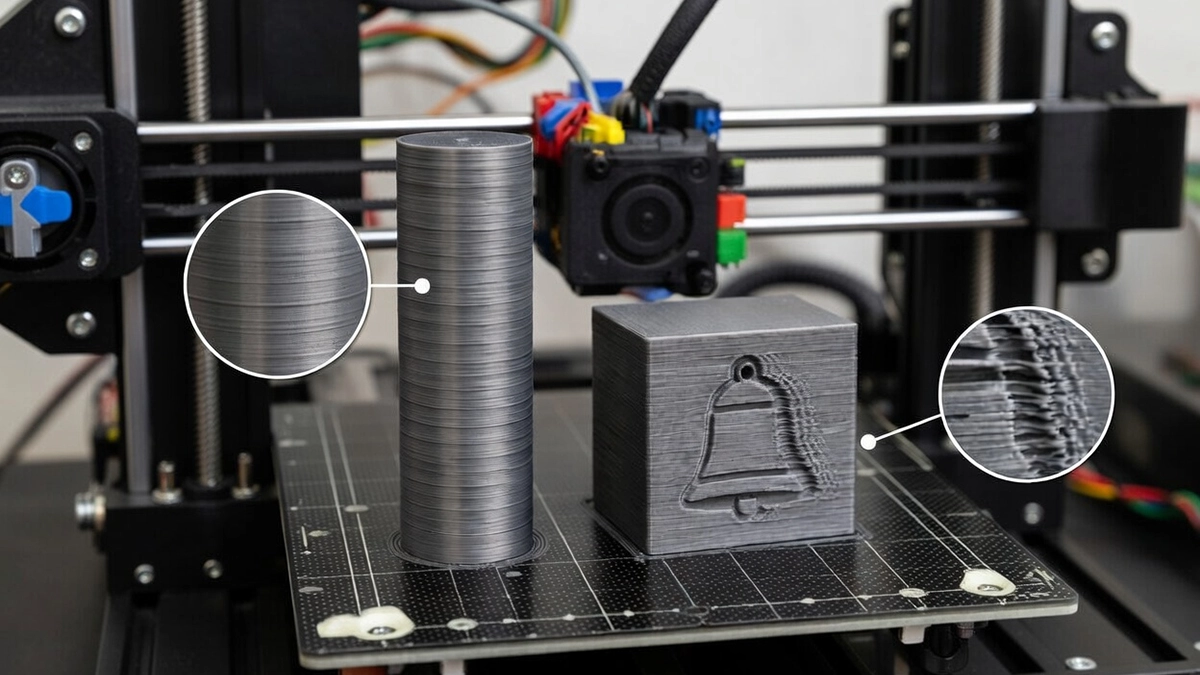
If you’ve ever pulled a print off your 3D printer and noticed strange lines or ripples ruining an otherwise perfect surface, you’re not alone. Two of the most common surface defects makers encounter are Z-banding and ghosting.
The good news? Both issues are fixable.
In this guide, we’ll break down what causes these defects, how to spot them, and—most importantly—how to fix Z-banding and ghosting in your 3D prints for smoother, cleaner results.
What Is Z-Banding in 3D Printing?
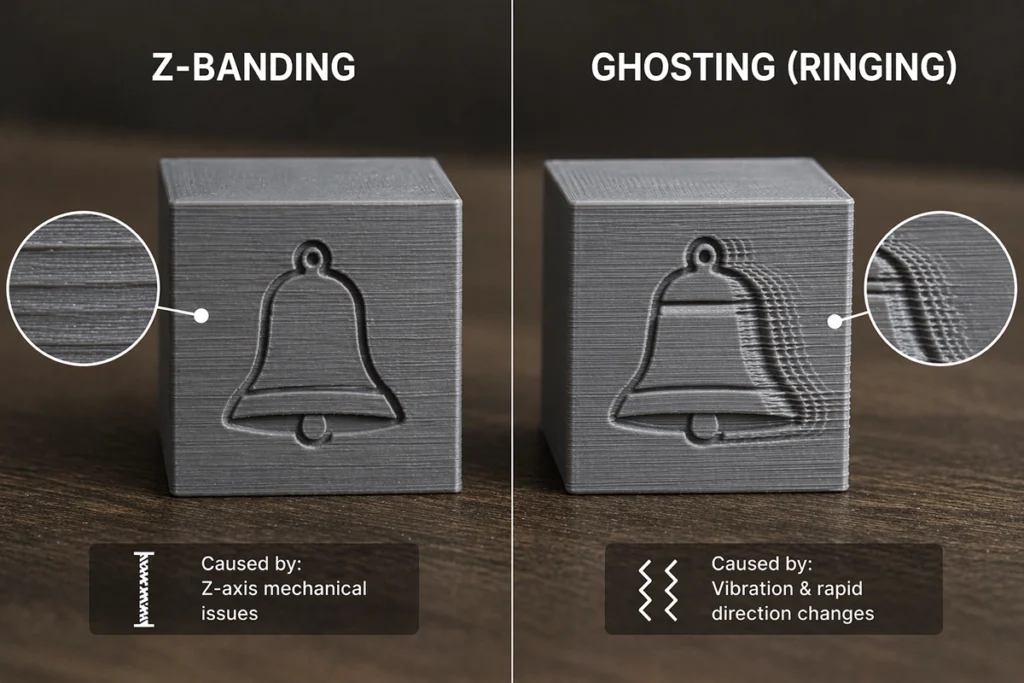
Z-banding (also known as Z-wobble) appears as horizontal lines or ridges that repeat at consistent intervals along the height of a print. These bands are typically most visible on flat, vertical surfaces.
Unlike normal layer lines, Z-banding looks uneven—almost like the printer is slightly shifting up and down as it builds.
What Causes Z-Banding?
Z-banding is almost always related to mechanical inconsistencies in the Z-axis (the vertical movement of your printer). Here are the most common causes:
1. Leadscrew Imperfections
Your printer’s leadscrew controls vertical movement. If it’s bent, warped, or manufactured with uneven threading, it can cause small but noticeable shifts in layer height.
2. Z-Axis Stepper Motor Issues
If the motor doesn’t receive enough current, it may miss steps, leading to inconsistent layer positioning.
3. Axis Binding or Friction
If your Z-axis components aren’t moving freely—due to poor lubrication, dirt, or wear—you may get resistance that shows up as banding in your print.
What Is Ghosting (Ringing) in 3D Printing?
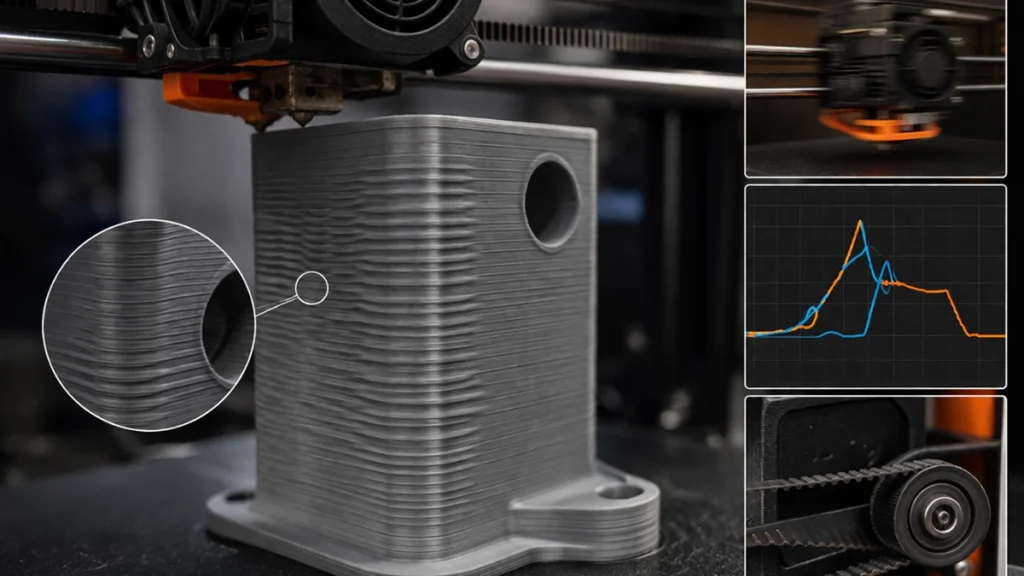
Ghosting, also known as ringing, appears as faint “echoes” or ripples on the surface of your print. These are usually visible near sharp edges, corners, or detailed features.
It looks like the printer is “vibrating” the shape outward—creating a repeated shadow of the original feature.
What Causes Ghosting?
Ghosting is caused by vibrations in the printer’s motion system, especially during rapid direction changes.
1. Printer Momentum and Vibration
When your print head moves quickly and suddenly changes direction, inertia causes slight overshoot. This vibration carries through the frame and shows up on your print.
2. High Acceleration and Jerk Settings
Aggressive motion settings force the printer to start and stop too quickly, increasing the likelihood of vibration.
3. Loose Belts or Pulleys
Slack in belts or components allows unintended movement, which creates those ghosted “echo” lines.
How to Fix Z-Banding in 3D Prints
If you’re struggling with Z-banding in 3D printing, the solution usually lies in improving your printer’s mechanical stability.
1. Inspect Your Z-Axis Hardware
Start with a physical check:
- Make sure your leadscrew is perfectly straight
- Check that all couplers and mounts are secure
- Clean and lubricate the leadscrew if needed
- Manually move the Z-axis to ensure it travels smoothly without resistance
Even a small wobble can translate into visible defects.
2. Improve Z-Axis Stability
If your printer design allows for it, consider upgrades:
- Add a second leadscrew for better balance
- Install support brackets to reduce wobble
- Tighten any loose rods, rails, or bearings
A more rigid Z-axis equals more consistent layers.
3. Adjust Stepper Motor Current
Sometimes the issue is electrical rather than mechanical.
- Slightly increase the Z-axis motor current
- Ensure it’s within safe limits to avoid overheating
This helps prevent missed steps and keeps your layer height consistent.
How to Fix Ghosting in 3D Printing
Fixing ghosting in 3D prints is all about reducing vibration and improving motion control.
1. Optimise Motion Settings
Your slicer plays a big role here.
- Lower acceleration settings
- Reduce jerk (sudden speed changes)
- Decrease overall print speed, especially for outer walls
Slower, smoother movements reduce vibration significantly.
2. Correct Belt Tension
Belts should feel firm but not overly tight.
- Loose belts = sloppy movement and ghosting
- Over-tight belts = extra strain on motors and bearings
Aim for a balanced tension that allows smooth, controlled motion.
3. Reduce Environmental Vibrations
Your printer’s surroundings matter more than you think.
- Place it on a solid, stable surface
- Avoid wobbly tables or desks
- Use rubber feet or vibration-damping pads
Even minor external vibrations can show up in your prints.
4. Strengthen the Frame
A rigid printer frame is key.
- Tighten all screws and bolts
- Check for any structural movement or flex
- Reinforce weak points if needed
The sturdier the frame, the less vibration transfers into your prints.
Z-Banding vs Ghosting: Key Differences
While both issues affect surface quality, they have very different root causes:
| Issue | Appearance | Main Cause |
|---|---|---|
| Z-Banding | Horizontal lines at fixed intervals | Z-axis mechanical issues |
| Ghosting | Rippled “echo” near features | Vibration and motion |
Understanding the difference is crucial when troubleshooting—otherwise, you may fix the wrong problem.
What Results Can You Expect After Fixes?
Once you’ve addressed these issues, the improvement is usually immediate and noticeable.
You should see:
- Smoother vertical walls
- Consistent layer lines
- Reduced rippling and surface defects
- Sharper details and cleaner edges
In short, your prints will look more professional and require less post-processing.

Final Thoughts
Z-banding and ghosting in 3D printing can be frustrating, especially when your settings seem correct but your prints still fall short. The key thing to remember is that these issues are rarely caused by slicer settings alone.
Instead, they’re usually a sign that your printer needs a bit of mechanical fine-tuning or maintenance.
By focusing on:
- Z-axis alignment and stability
- Proper belt tension
- Reduced vibration
- Balanced motion settings
…you’ll be well on your way to cleaner, more consistent prints.
If you’re serious about improving your print quality, tackling these two common issues is one of the best places to start.
